Can I Use Fiber Cement U...
- Mon to Fri: 09:00 am to 07:00 pm

Vinyl siding is one of the most popular exterior cladding materials in the United States, especially in Northern California. It is affordable, durable, and relatively easy to maintain. However, there are times when you need to remove vinyl siding, whether for a home improvement project, to check for water damage, or to replace vinyl siding with something more modern and long-lasting like fiber cement or engineered wood.
At Pro Superior Construction, we specialize in siding removal and replacement for homes throughout the Sacramento and San Francisco Bay Areas. In this in-depth guide, we’ll show you exactly how to remove vinyl siding, what tools you’ll need, and what to do next once the old siding is off your house.

There are several reasons why a homeowner might need to remove vinyl siding. It could be due to cracks, holes, or general wear and tear. Sometimes vinyl becomes brittle from years of sun exposure and extreme weather. In other cases, homeowners remove siding to replace it with new siding that offers better energy efficiency or aesthetic appeal.
Some common reasons for vinyl siding removal include:
Regardless of the reason, proper siding removal is essential to avoid damaging the structure of the house or the vinyl panels themselves if you intend to reuse them.
Having the right tools for the job can make the siding removal process safer, faster, and more effective. Most of these tools can be found at your local hardware store.
Having these tools in hand before you start removing siding ensures the job goes smoothly and reduces the risk of damaging other parts of the wall or exterior structure.

Before you begin, make sure the space around the house is clear. Move patio furniture, garden tools, or anything else that could block access. Cover any landscaping or surfaces with tarps to protect them from falling siding or nails. Inspect the weather forecast and avoid rainy or windy days.
Make sure your ladder is placed securely and there’s plenty of space to safely move around while working on the wall. Remember, siding panels are large and can become unstable when loose.
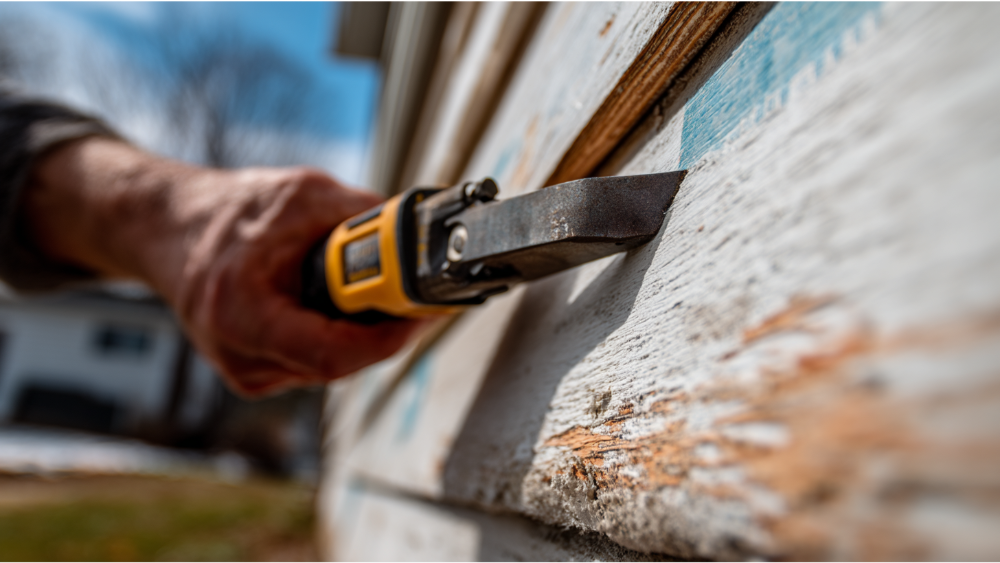
While siding is installed from the bottom up, removing vinyl siding is usually easier when you start at the top. Using your zip tool, slide it underneath the bottom edge of the top panel until it hooks onto the locking tab. Push the tool along the panel to release the vinyl from the strip below. This action will separate the two pieces so you can begin to pull the top panel away from the wall.
Once the top edge is free, you’ll see the nailing flange. Use your pry bar or hammer to pull out the nails holding the panel to the wall. Be careful not to damage the sheathing underneath. Many homeowners choose to leave one nail in the center temporarily to keep the panel stable while they work on loosening both ends.
Repeat this process for each panel, pulling nails and sliding the zip tool to unlock sections one by one.
After removing the top piece, continue downward, one piece at a time. Use the zip tool to slide along the edge, pull the panel loose, then remove the nails or screws. Keep the panels in good shape by gently lowering them instead of letting them drop to the ground.
As you continue, check for any blocked areas, like under windows, behind utility boxes, or near doors. These areas often have additional pieces like j channels, corner posts, or trim that need to be carefully removed. Use a utility knife to cut through any caulk or paint sealing the panels.
Vinyl siding around corners and openings can be tricky. The j channel, for example, must often be removed to free the siding near doors and windows. Use your pry tool and knife to release these sections without cracking or bending them. Be extra cautious here to avoid breaking pieces or damaging the edge of the wall.
For two pieces that meet at a corner or near a frame, gently push or pull them apart while supporting the structure with one hand.
Continue the removal process across the entire side of the house. Depending on the size of the job and the number of obstacles, it may take several hours to strip one whole wall. Place all old siding in a truck or trailer if you’re planning full replacement, or stack reusable panels in a dry, shaded area if they’re still in good shape.
Use a magnetic sweeper to collect all nails and screws from the ground before someone steps on them.

Once the vinyl siding removal is complete, inspect the wall beneath. This is a critical step in any home improvement project involving siding. Look for signs of rot, mold, or water damage. If your sheathing or insulation is exposed or damaged, it’s best to stop and have a professional evaluate your next steps.
Check for:
This is also the best time to install house wrap or a vapor barrier to protect your home before putting on new siding.
Now that the old siding is off, you can begin planning what kind of new siding to install. Many homeowners in our region choose materials that offer more durability and style, such as:
Choosing the right material will depend on your budget, style preferences, and long-term home improvement goals. If you’re unsure which siding matches your needs, we can help you select and install the ideal product for your property.

Vinyl siding removal is manageable for a confident DIY homeowner with the right tools, but there are some situations where it’s best to hire a professional:
At Pro Superior Construction, we provide expert siding removal and replacement for homes throughout the Rocklin, Sacramento, and Bay Area regions. We use professional-grade tools, manage every detail of the job, and ensure that your new siding is installed properly and efficiently.
Yes, you can reuse vinyl siding if it’s still in good shape. Carefully removed panels that are not brittle or cracked can be reinstalled. Store them flat and away from sunlight to keep them from warping.
Removing vinyl siding from a single-story house usually takes one day. For a larger job or multi-story buildings, expect a two to three-day process depending on weather and layout.
Zip tools are specifically designed for vinyl siding. They are inexpensive and available at any hardware store. Using the wrong tool could damage the panel or fail to release the bottom edge properly.
If you find signs of rot, moisture, or mold under your siding, stop immediately and call a siding contractor. It’s important to fix structural problems before installing new siding.
Most cities in Northern California do not require a permit to remove siding. However, if you plan to replace vinyl siding with a different material, or if the job involves structural changes, you may need a permit. Always check with your local building department.
Vinyl siding removal is the first step in many major home improvement projects, from aesthetic upgrades to weatherproofing. Whether you’re preparing to install high-performance fiber cement, engineered wood, or simply want to replace vinyl siding that’s worn out, Pro Superior Construction is here to help.
Our team is certified, experienced, and local to the Rocklin and Sacramento regions. We provide full-service siding removal, inspection, and installation using only premium materials and industry-best techniques.